How To Enable Multi-Factor Authentication On Amazon.com
How To Enable Multi-Factor Authentication On Amazon.com (And Other Sites You Use)
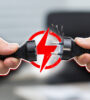
Even if you’ve never enabled it, you might be familiar with the idea of multi-factor authentication (MFA), a login security feature offered by a range of different services. Do you know how to enable it?
Online services from email providers and financial websites to social network sites offer the ability to enable MFA to better secure your accounts and data.
This is a great way to add an extra layer of protection to the existing system and account logins. Have you harnessed MFA to enhance your cybersecurity yet?
The protection that MFA adds allows you to use your passwords for a longer length of time between password resets, and in the event that your service provider is compromised and your email and password end up in an open database on the open web, you will have time to change your password before your individual account is compromised.
How Does MFA Work?
When you log in to an account that has MFA enabled, in addition to entering your password, you must either enter in an added generated code, or authorize login with a “push” request to a secondary device.
In the event your password is compromised, your account can remain secure as the cybercriminal is unable to authenticate the secondary requirement.
There is a range of options for generating the MFA codes:
- Receiving a text message
- Using a dedicated authenticator application
- Possessing a physical device on which you must push a button to verify that you are the authorized user of that account
How To Enable MFA On Amazon
- Go to “Advanced Security Settings”.
- Click “Get Started” to set-up Two-Step Verification.
- Add your primary phone number or download an authenticator app.
- Click “Send code”.
- Enter the code that was sent to your phone number or generated through the authenticator app and click “Verify” code and continue.
How To Enable MFA On Your Banking Website
Every major banking service in the country offers or automatically enforces some form of MFA. While the specifics will differ slightly from one bank to another, you should find the option under your account settings in the security menu.
For example, you can enable MFA on Bank of America accounts by following these steps:
- Select “Profile & Settings” in the top left-hand corner.
- Click “Manage SafePass”.
- Click “Add SafePass”.
- Follow the on-screen steps.
How To Enable MFA On Your Personal Email
Similar to banking sites, whatever email service you use almost certainly offers an MFA feature. For example, with Gmail, follow these steps to set up MFA:
- Open your Google Account.
- In the navigation panel, select “Security”.
- Under “Signing in to Google,” select 2-Step Verification and then Get started.
- Follow the on-screen steps.
Need Help With MFA?
If you’re unsure about how to implement an MFA solution, don’t try to handle it all on your own. TLC Tech will help you evaluate your password practices and security measures as a whole to make sure you’re not taking any unnecessary risks.
Call us at (916) 441-3838 or complete the form below and we'll help in any way we can.
"*" indicates required fields